
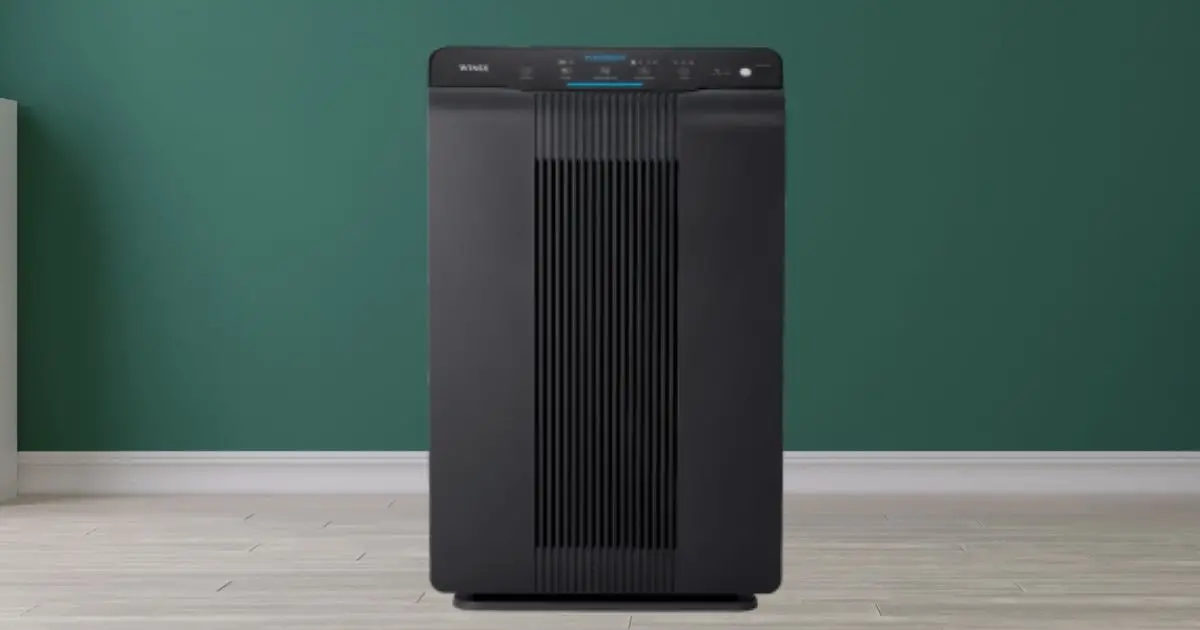
Your WINIX air purifier is letting you know that it is time to change your HEPA filter with the replace my filter red light warning, and your allergy symptoms are resurfacing with itchy eyes, coughing, and maybe even hives. It is time to replace your WINIX air purifier’s HEPA filter.
We are going to cover the simple steps of changing your WINIX HEPA filter and getting you back on the road to clean air. These steps work on many models including the 5300 and 5500-2.
As an Amazon Associate, I earn from qualifying purchases
Table of Contents
Steps to Replace a WINIX Filter
By following these steps you will be able to successfully replace your Winix air purifier filter and get back to enjoying clean air in less than 10 minutes. The filter-changing steps are very similar (or the same) on the following WINIX Models:
- 6300-2
- 5500-2
- 5300-2
- C555
- C535
- WINIX ZERO
Step 1: Gather supplies
To replace your HEPA filter, you will need the following supplies:
- Replacement HEPA Filter
- Safety Pin, bobby pin, or thumbtack(something small to reset the filter notification)
If you do not already have your WINIX replacement filter, you can buy them directly from WINIX through their Amazon Store.
Step 2: Power off and unplug the air purifier

The first step in changing your filter is powering it off and unplugging it from the wall.
This will ensure you have enough space to move around and you won’t accidentally get an injury or suck contaminates into the fan when the filter is removed.
If the air purifier is warm, allow the unit to cool before proceeding to the next step.
Step 3: Remove the front panel
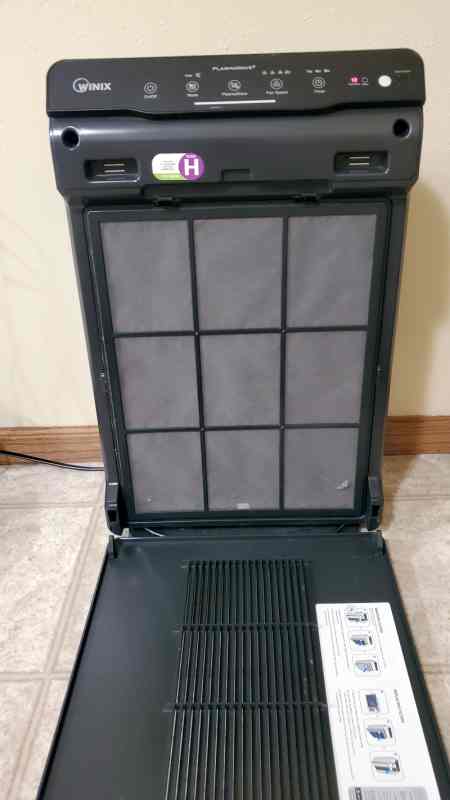
Remove the front cover plate by gently pulling the cover towards the top of the air purifier and setting it aside.
You may notice dust has built up where the air passes through the panel, vacuum out the dust, and/or wipe it down with a cloth dampened with water. Check the magnet areas at the top to ensure they are unobstructed and clean.
Step 4: Remove the mesh pre-filter

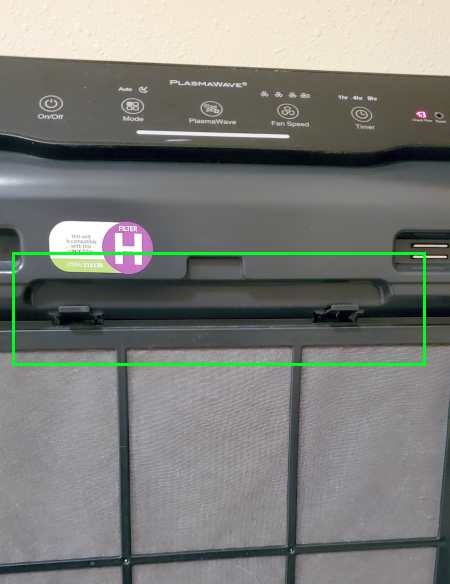
Locate the release tabs of the pre-filter at the top, and gently push down and pull towards you. Once removed, set aside or clean.
Mesh Pre-Filter Cleaning Instructions:
- Vacuum out the dust. I have found the hose with the brush attachment works best
- If extra dirty and the vacuum doesn’t work, rinse the pre-filter in room temperature water (no cleaners or soaps)
- Allow the filter to air dry for at least 24 hours before placing back into the unit
Step 5: Remove the carbon filter
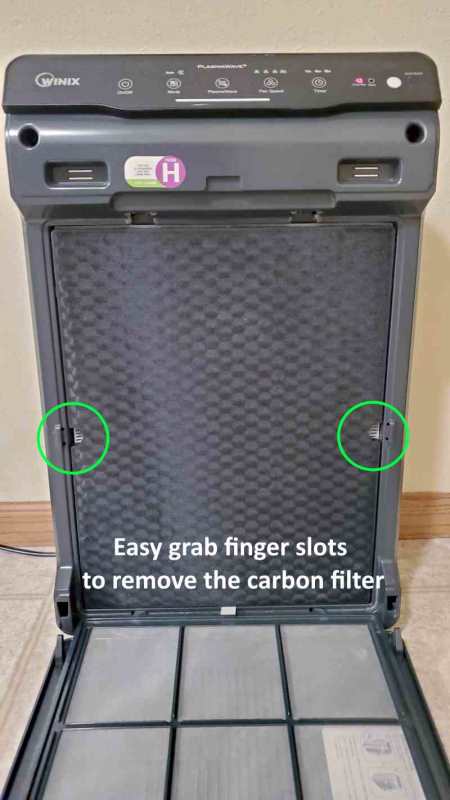
There are two small finger holes on each side of the filter to grab and remove the charcoal filter. Remove and set aside, or clean.
Carbon Filter Cleaning Instructions:
- Run under room temperature water (not hot).
- Only use water and do not use cleaners or soaps
- Allow the filter to air dry for at least 24 hours before placing back into the unit
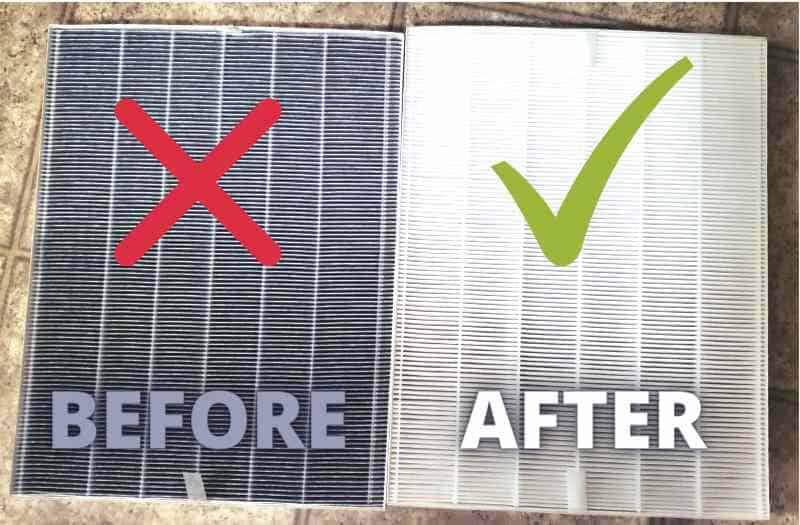
Step 6: Remove the HEPA filter
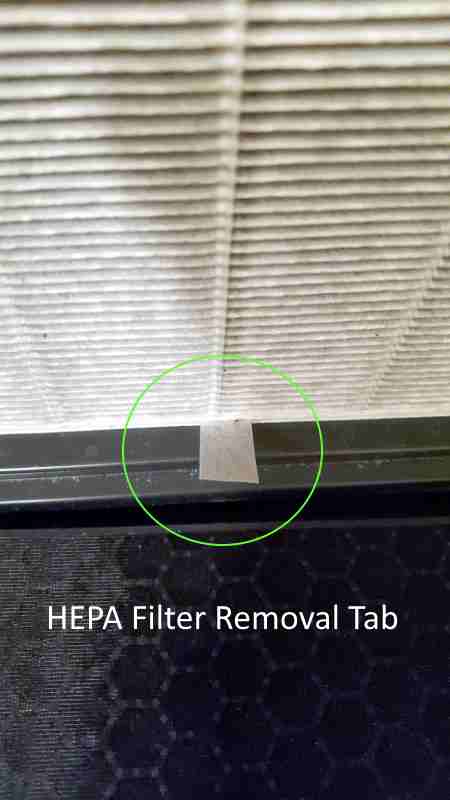
Remove the soiled HEPA filter. Depending on your specific filter, there may be a pull tab to assist in the removal.
Step 7: Inspect your Winix air purifier unit
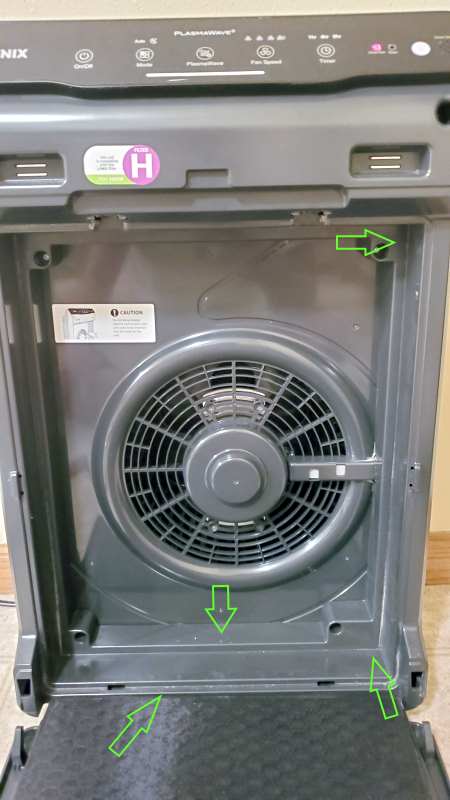
Inspect the air purifier unit for any areas where dust or debris may have gotten into this area and vacuum or wipe it out with a damp cloth. I notice very minimal dust around the edges when I change our filter. This step should only take a few minutes.
Step 8: Replace the Winix Filter
Grab your new Winix HEPA filter, and remove it from the box and plastic. Then, locate the airflow indicator on the top or bottom of the HEPA filter and point the arrow into the air purifier, then gently place the filter into the unit.
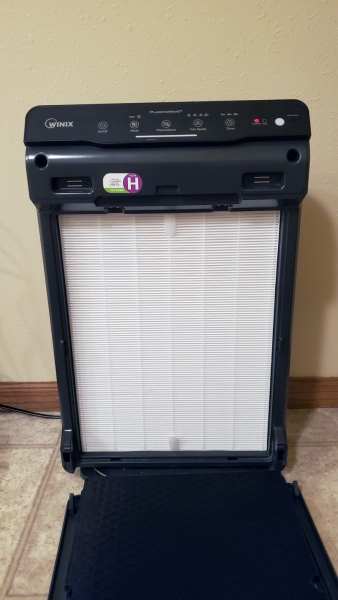
Note: when handling the HEPA filter be careful not to get it wet or damage the filter, this can compromise its performance.
Step 9: Reinstall the carbon filter
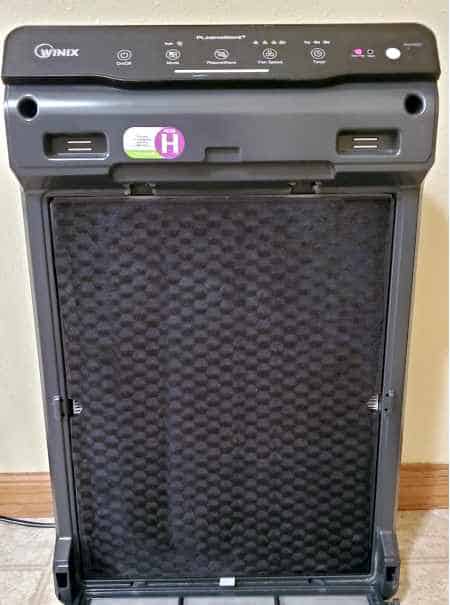
Place the carbon filter on top of the new HEPA filter and hold it in place. Have your mesh pre-filter handy for the next step. When you order replacement HEPA filters, you sometimes get a carbon filter as well, this is the point at which you would install the new carbon filter if you purchased one.
Step 10: Reinstall the mesh pre-filter

Place the pre-filter on top of the carbon filter. Align the bottom nubs into their respective slots and lightly press the top tabs into place. This will lock and secure all 3 filters (HEPA, carbon, and pre-filter).
Step 11: Place the front cover back into place
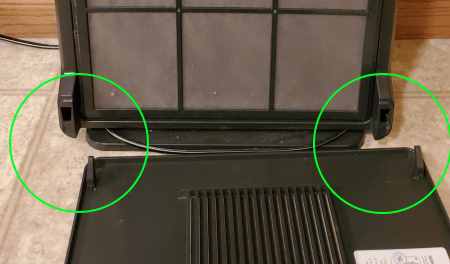
Place the front panel back into place by aligning the tabs towards the bottom of the cover with the air purifier. Once aligned, push the top of the cover to align with the top of the unit until the magnets engage.
Step 12: Plug in and power on the air purifier
Plug the air purifier back into the outlet and power on the unit by pressing the “On/Off” button on the top of the unit.
Step 13: Reset the “change filter” light
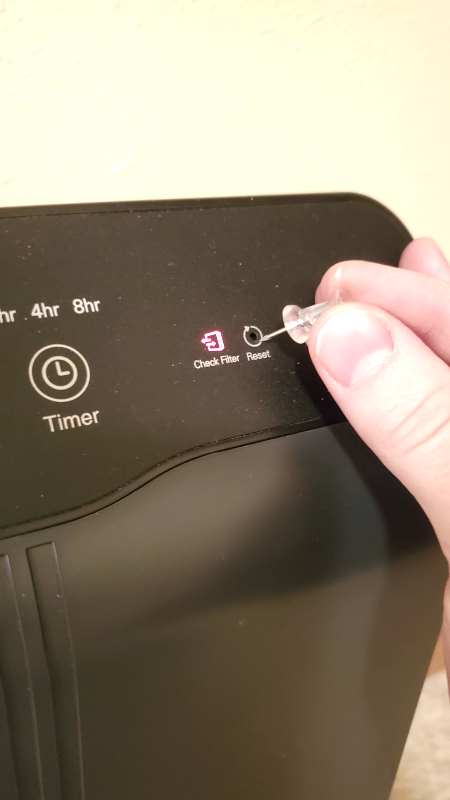
Now that you have replaced the HEPA filter, you will need to reset the “Replace Filter” notification.
To do this, place your pointy object (bobby pin, safety pin, thumbtack) into the small hole located next to the check filter light (if illuminated), inside the reset loop.
Hold down the reset button for about 5 seconds until the light resets or the unit beeps.
You are now good to go and will be notified in about a year (minimum recommended replacement time)
Step 14: Enjoy clean air
You have just replaced a Winix filter! Nice work. Now you can enjoy fresh filtered air for the next 3-12 months.
Troubleshooting
Uh-Oh, did something not go as planned? Here are the top issues that you may encounter when you replace a Winix filter.
Mesh pre-filter will not lock into place
If the Mesh pre-filter will not lock the HEPA and carbon filter into place, typically this is caused by the pre-filter being installed backward.
To resolve this, rotate the mesh filter and align the tabs at the top to secure the filter into place.
The device will not power on
If your WINIX filter won’t power on, check that the purifier is plugged in and try powering on the unit again. Unplug and remove all the filters, place them back into place, plug in the unit, and try to power it on.
If that doesn’t work, try a different outlet on a different wall.
If that this point the unit will not power on at all, you should call WINIX Customer Service at 847-551-9900.
The front panel cover doesn’t fit
If your front cover of the air purifier does not fit or stay on, check the following:
- Ensure the magnetic plates are clean and unobstructed on the air purifier and the front cover
- Check filter placement by ensuring the HEPA filter is pressed into the unit, with the airflow headed in the right direction
- Ensure the carbon filter is firmly against the HEPA filter. Align the mesh pre-filter (step 11)
Once the above steps are completed, your issue should be resolved.
Final Thoughts
Hopefully, I have provided you with an easy step-by-step process to replace your WINIX HEPA Air Filter. Did you know? There are bamboo charcoal air purifier sachets that may be the answer to your hard-to-reach places like cars and closets.